
Your needs, this model
Does it fit your priorities?
Can I use the same USA electric oven inside and outside?
Yes. The earlier Volt 12 USA manual permits both locations, with dry indoor storage and suitable surface, ventilation and electrical arrangements. Include earlier models when comparing this version.
Explore this need in the finder →Can I heat the stone with Boost while using manual electric temperature control?
Yes. The older model uses a 45-second lower-element Boost, followed by a period when Boost is unavailable. It differs from the Volt 2 top Boost.
Explore this need in the finder →Can I use a 90°F dough-proofing setting on the earlier Volt 12?
No. Its USA temperature control starts at 250°F in the illustrated range, and it does not provide the Volt 2 dedicated 70–100°F proofing mode.
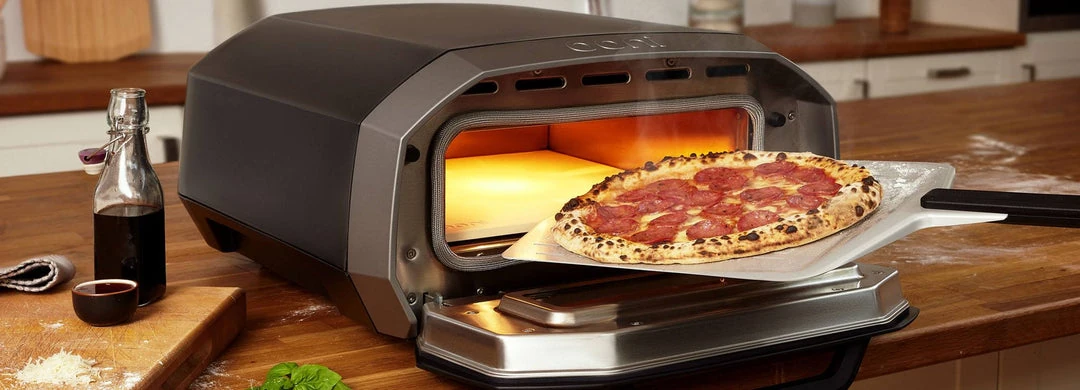
Explore this need in the finder →The Ooni Volt 12 is the earlier electric Ooni with three prominent control dials and permission for both indoor and outdoor cooking. It suits a buyer who wants to adjust the balance between the top element and the stone's lower element directly, and who values using the same oven in the kitchen and at a suitable outdoor station. This assessment concerns the USA 120V, 1600W version.
It is a different appliance from the Volt 2. The newer model adds named pizza presets, a dough-proofing mode, two saved custom settings and a removable filter. It is also indoor-only. A listing that abbreviates the name to “Volt” needs a careful check: the older three-dial front and the newer digital control panel represent different routines, not two colors of the same cooker.
Electric cooking that can move outside
Ooni's USA manual specifically permits outdoor use and requires dry indoor storage when the oven is idle. That makes the Volt 12 useful when a pizza night sometimes moves to a patio, provided the outlet, support surface and cable route are suitable. It does not make the appliance an outdoor storage cabinet or justify leaving it exposed between sessions.
Choose a clean, level, stable surface with ventilation and clear space around the oven. The instructions say to leave the area above generally clear, avoid an enclosed space, retain access to the side power switch and position the front so the door can open fully. They do not supply the newer Volt 2's numerical clearance rule. If a fitted shelf or overhead cabinet makes that distinction important, obtain advice for the exact older oven before buying.
The USA manual specifies 120V outlets only. When an extension is necessary, its electrical rating must at least match the 1600W appliance, it must be grounded appropriately, and the route must prevent pulling or tripping. Outdoor extensions need outdoor suitability, with the connection dry and off the ground. A simple plug adapter does not turn a different regional voltage version into this US model.
Side handholds help with carrying the cooled oven. Plan its destination before lifting, leave room for the opening door and keep the cable away from the hot underside. The manual calls for approximately ten minutes of powered standby cooling before disconnecting and 90 minutes before moving. That makes changing locations a between-sessions job.
Three dials separate time, temperature and balance
The left dial sets a timer up to 20 minutes. The middle dial selects temperature, with the USA control illustration spanning 250–850°F. The right dial shifts power toward the top element or the lower element beneath the stone. These controls let you respond to an uneven result: a pale base and well-browned toppings call for a different adjustment from a dark base and unfinished top.
The oven starts with a recommended balance for the temperature selected. During preheating the balance indicator goes out; it becomes adjustable once the target temperature is reached. That is more deliberate than selecting a named pizza button. Keep a note of the temperature, balance, dough size and cooking time that work together, then change one factor on the next bake.
The built-in temperature indication is useful for following heat-up, but Ooni also recommends an infrared thermometer to check the stone. Air temperature alone does not tell you that the entire cooking surface has recovered after repeated launches. The internal light and viewing window help you watch the food, while a peel and manual turning remain part of the job.
Boost is for the lower stone, rather than the toppings
Turning the balance dial fully counterclockwise activates a 45-second boost that recharges the stone through the lower element. Afterward the balance returns to its temperature-recommended setting. The lower icon flashes slowly while another boost is unavailable; wait until it stops flashing before trying again.
This is particularly relevant to a series of small pizzas whose bases are falling behind the tops. It is not the same function as Volt 2's top-element boost in Neapolitan mode, and it is not powered rotation. The cooking surface stays stationary. Neither generation supplies the Koda family's optional rotating-stone arrangement.
Ooni describes a 13-inch-square stone and promotes the oven for 12-inch pizza. That leaves working room for a round rather than encouraging dough to occupy every edge. Serve larger groups as successive individual pizzas. If two 12-inch pizzas must cook together, the outdoor Koda 2 Max has a different stationary-floor layout; the Volt 12 does not gain that capacity from having two heating elements.
Keep the stone dry and identify the earlier version
Before the first cook, the USA instructions prescribe a 20-minute seasoning run at 850°F, followed by cooling. For ordinary care, let the oven cool and unplug it before wiping the exterior. Clean grease from the cooled glass, dry it thoroughly and avoid oven cleaners or metal scourers.
The stone is not a sink-washable pizza tray. Avoid extreme temperature changes, never cool it with water and do not use it damp. The manual also prohibits putting frozen food directly on it above 350°F. To remove burned residue, cool the stone, remove loose debris and turn it over so the underside can burn clean during the next use. Do not apply Volt 2's removable-filter procedure to an oven with a different construction.
Choose the Volt 12 when hands-on heat balancing and indoor/outdoor flexibility outweigh the convenience of modern presets. Before ordering an earlier-model listing, confirm the USA electrical rating, exact oven identity and included stone. Choose Volt 2 for controlled low-temperature proofing and saved preset routines. Choose a larger outdoor cooker when pizza diameter or simultaneous serving, rather than electrical convenience, decides the purchase.
Key details at a glance
| Fuel versions | Earlier USA 120V / 1600W electric; indoor/outdoor use with dry indoor storage. |
|---|---|
| Maximum pizza on standard stationary floor | 12 in |
| 12-inch pizzas at once on standard floor | 1 |
| Temperature hub supplied with oven | No |
| Food probes supplied with oven | 0 |
| Motorized stone supplied in base package | No |
| Manufacturer maximum temperature | 850 °F |
| Monitoring and controls | Local temperature dial, separate timer and top/bottom balance; app connection not documented. |
| Optional rotating setup | Stationary stone and manual turning. |
| Space and measurement note | The earlier USA manual requires clear space, general overhead clearance and full door movement. Confirm the exact older-unit footprint for fitted furniture. |
| Stone care | Keep the stone dry. No frozen food directly on the stone above 350°F. Allow approximately 10 minutes of powered standby before disconnecting and 90 minutes before moving. |
| Cooking modes and limits | Temperature, timer and top/bottom balance dials; no dedicated proofing or named pizza preset buttons. |
| Boost routine | Lower-element stone recovery for 45 seconds; wait for the availability indicator before another Boost. |
| US voltage | 120 V |
| Electrical input | 1600 W |
| Saved custom settings | 0 |
| Dedicated dough-proofing mode | No |
Use the exact model’s instructions for operating limits, supplied equipment and version differences.
Sources for this assessment
Find a setup for your pizza night.
Choose your fuel, pizza diameter and serving layout, then add turning and monitoring requirements.